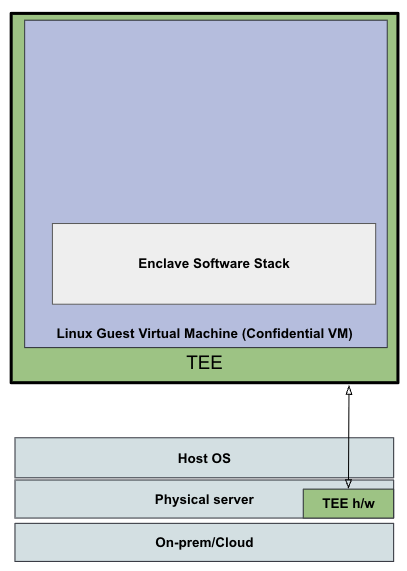
This lab demonstrates the core attestation loop on a real Confidential VM. You will provision two Azure VMs — a standard Ubuntu VM hosting Trustee (KBS) and a hardware-backed Confidential VM running the guest-components stack — then retrieve a secret from Trustee via hardware attestation. This is the same flow described conceptually in the Confidential Virtual Machines and Trustee chapters.
Prerequisites
An Azure subscription with vCPU quota for Confidential VM sizes in a supported region. Check and request quota before starting:
# Check current quota for DCasv5 (AMD SEV-SNP) in East US
az vm list-usage --location eastus --output table | grep -i "DC.*v5\|standard DC"

# Or for West Europe
az vm list-usage --location westeurope --output table | grep -i "DC.*v5\|standard DC"
Confidential VM sizes are available in select regions. Verified supported regions include East US, West US, West Europe, North Europe, and Southeast Asia. If your nearest region lacks quota, request an increase via the Azure portal under Subscriptions → Usage + quotas.
The Azure CLI installed and logged in (
az login)
Choose Your TEE Platform
This lab supports two hardware paths. Pick one and use those commands throughout:
| AMD SEV-SNP | Intel TDX | |
|---|---|---|
| VM size | Standard_DC2as_v5 | Standard_DC2es_v5 |
| Azure series | DCasv5 | DCesv5 |
| vCPU / RAM | 2 / 8 GB | 2 / 16 GB |
| Approx. cost | ~$0.10 / hr | ~$0.15 / hr |
Step 1: Provision Infrastructure
Set your region and TEE choice as variables first, then run the common provisioning commands.
az login
az account set --subscription "<YOUR_SUBSCRIPTION_ID>"

# Set your preferred region (eastus or westeurope)
export LOCATION="eastus"

# Set CVM size: AMD SEV-SNP or Intel TDX (pick one)
export CVM_SIZE="Standard_DC2as_v5"   # AMD SEV-SNP
# export CVM_SIZE="Standard_DC2es_v5"   # Intel TDX

az group create --name cvm-lab --location "${LOCATION}"
Find the latest Ubuntu 26.04 CVM-compatible image for your region:
az vm image list \
  --publisher Canonical \
  --offer ubuntu-26_04-lts \
  --sku pro-server-cvm \
  --location "${LOCATION}" \
  --all \
  --output table | tail -5
Use the URN from the output (e.g., Canonical:ubuntu-26_04-lts:pro-server-cvm:latest) as CVM_IMAGE below:
export CVM_IMAGE="Canonical:ubuntu-26_04-lts:pro-server-cvm:latest"Create both VMs in the same virtual network so the CVM can reach Trustee over a private IP:
# Standard Ubuntu VM for Trustee
az vm create \
  --resource-group cvm-lab \
  --name trustee-vm \
  --image Canonical:ubuntu-26_04-lts:server:latest \
  --size Standard_D2s_v3 \
  --location "${LOCATION}" \
  --admin-username azureuser \
  --generate-ssh-keys \
  --vnet-name cvm-lab-vnet \
  --subnet cvm-lab-subnet

# Confidential VM
az vm create \
  --resource-group cvm-lab \
  --name cvm-demo \
  --image "${CVM_IMAGE}" \
  --size "${CVM_SIZE}" \
  --location "${LOCATION}" \
  --security-type ConfidentialVM \
  --os-disk-security-encryption-type VMGuestStateOnly \
  --enable-vtpm true \
  --enable-secure-boot true \
  --admin-username azureuser \
  --generate-ssh-keys \
  --vnet-name cvm-lab-vnet \
  --subnet cvm-lab-subnet
Allow port 8080 between the two VMs (KBS default port):
az network nsg rule create \
  --resource-group cvm-lab \
  --nsg-name trustee-vmNSG \
  --name allow-kbs \
  --priority 1010 \
  --protocol Tcp \
  --destination-port-ranges 8080 \
  --access Allow
Capture IPs for SSH and inter-VM communication:
export TRUSTEE_PUBLIC_IP=$(az vm show -g cvm-lab -n trustee-vm --query publicIps -d -o tsv)
export TRUSTEE_PRIVATE_IP=$(az vm show -g cvm-lab -n trustee-vm --query privateIps -d -o tsv)
export CVM_PUBLIC_IP=$(az vm show -g cvm-lab -n cvm-demo --query publicIps -d -o tsv)

echo "Trustee public:  ${TRUSTEE_PUBLIC_IP}"
echo "Trustee private: ${TRUSTEE_PRIVATE_IP}"
echo "CVM public:      ${CVM_PUBLIC_IP}"
SSH shortcuts — open two terminal windows, one for each VM:
# Terminal A — Trustee VM
ssh azureuser@${TRUSTEE_PUBLIC_IP}

# Terminal B — CVM
ssh azureuser@${CVM_PUBLIC_IP}
Step 2: Deploy Trustee on the Trustee VM
SSH into trustee-vm (Terminal A — TRUSTEE_PUBLIC_IP was captured in Step 1):
On trustee-vm:
# Install Docker via official script (pro-server-cvm image does not include docker-compose-plugin in default repos)
curl -fsSL https://get.docker.com | sudo sh
sudo usermod -aG docker $USER && newgrp docker

# Clone Trustee v0.20.0
git clone https://github.com/confidential-containers/trustee --single-branch -b v0.20.0
cd trustee
The docker-compose file bundles KBS, the Attestation Service (AS), and RVPS as separate services. A one-shot setup container generates the ed25519 auth key pair automatically at kbs/config/private.key on first run.
The docker-compose at v0.20.0 references :latest image tags, which may be newer than the config schema bundled in the repo. Pin to the exact v0.20.0 image SHAs before starting:
SHA="d4e317620c4039c89779b725f74974d8f005da66"
sed -i "s|kbs-grpc-as:latest|kbs-grpc-as:${SHA}-x86_64|g" docker-compose.yml
sed -i "s|coco-as-grpc:latest|coco-as-grpc:${SHA}-x86_64|g" docker-compose.yml
sed -i "s|rvps:latest|rvps:${SHA}-x86_64|g" docker-compose.yml

# Start all Trustee services (key generation happens automatically)
docker compose up -d

# Confirm all three services are running
docker compose ps

# Confirm KBS is listening
curl -s http://localhost:8080/kbs/v0/resource/default/test 2>&1 | grep -o '"type":"[^"]*"'
Note the path to the auto-generated private key — you will need it in Step 5:
export KBS_PRIVATE_KEY="$(pwd)/kbs/config/private.key"
ls -la "${KBS_PRIVATE_KEY}"   # confirm the setup service created it
Keep this SSH session open — you will return to it in Step 5.
Step 3: Verify the CVM Hardware
SSH into cvm-demo (Terminal B — CVM_PUBLIC_IP was captured in Step 1).
Verify hardware memory encryption is active. The output depends on which TEE platform you chose:
# AMD SEV-SNP — look for:
sudo dmesg | grep -i sev
# Memory Encryption Features active: AMD SEV
# systemd[1]: Detected confidential virtualization sev-snp.

# Intel TDX — look for:
sudo dmesg | grep -i tdx
# tdx: TDX module: attributes 0x0, vendor_id 0x8086, major_version 1 ...
# tdx: Memory is marked as private in EFI memmap
Either output confirms the CVM is running inside a hardware TEE with encrypted memory. Note that dmesg requires sudo on the pro-server-cvm image.
Install Docker via the official script:
curl -fsSL https://get.docker.com | sudo sh
sudo usermod -aG docker $USER && newgrp docker

# Install ORAS — used to pull guest-components binaries from GHCR
ORAS_VER=$(curl -s https://api.github.com/repos/oras-project/oras/releases/latest | grep tag_name | cut -d'"' -f4 | tr -d 'v')
curl -fLO "https://github.com/oras-project/oras/releases/download/v${ORAS_VER}/oras_${ORAS_VER}_linux_amd64.tar.gz"
tar xzf oras_${ORAS_VER}_linux_amd64.tar.gz
sudo install -m 0755 oras /usr/local/bin/oras

# Install TPM2 libraries required by the attestation-agent
sudo apt-get install -y libtss2-tctildr0 libtss2-esys-3.0.2-0t64 libtss2-rc0t64
Step 4: Run the Guest-Components Stack
The guest-components stack consists of three binaries — the Attestation Agent (AA), the Confidential Data Hub (CDH), and the API Server — the same components embedded inside a CoCo CVM. They are distributed as OCI artifacts on GHCR and pulled with ORAS rather than Docker.
At v0.20.0 the commit SHA is f1561038b9a58d309a3366cc8e25d8e6162424a0. The AA tag also encodes the TEE platform. For Azure CVMs (both SNP and TDX), the platform is az-cvm-vtpm:
SHA="f1561038b9a58d309a3366cc8e25d8e6162424a0"
REG="ghcr.io/confidential-containers/guest-components"
mkdir -p ~/gc && cd ~/gc

# Pull all three in parallel
oras pull ${REG}/attestation-agent:${SHA}-az-cvm-vtpm_x86_64 &
oras pull ${REG}/confidential-data-hub:${SHA}-x86_64 &
oras pull ${REG}/api-server-rest:${SHA}-x86_64 &
wait

# Extract
tar xf attestation-agent.tar.xz
tar xf confidential-data-hub.tar.xz
tar xf api-server-rest.tar.xz
ls -lh attestation-agent confidential-data-hub api-server-rest
Create an AA config file pointing at the KBS (substitute the Trustee private IP printed in Step 1):
export KBS_URL="http://<TRUSTEE_PRIVATE_IP>:8080"

sudo tee /etc/attestation-agent.toml << EOF
[token_configs.kbs]
url = "${KBS_URL}"
EOF
Create the socket directories and start the three services in order:
sudo mkdir -p /run/confidential-containers/attestation-agent

# 1. Attestation Agent — ttRPC socket, accesses vTPM for SEV-SNP evidence
sudo ~/gc/attestation-agent --config-file /etc/attestation-agent.toml > /tmp/aa.log 2>&1 &
sleep 3

# 2. Confidential Data Hub — connects to AA, handles KBS resource requests
sudo AA_KBC_PARAMS="cc_kbc::${KBS_URL}" ~/gc/confidential-data-hub > /tmp/cdh.log 2>&1 &
sleep 3

# 3. API Server REST — HTTP proxy on 127.0.0.1:8006
sudo ~/gc/api-server-rest > /tmp/api.log 2>&1 &
sleep 2
Confirm all three sockets and the REST endpoint are up:
ls /run/confidential-containers/attestation-agent/attestation-agent.sock \
   /run/confidential-containers/cdh.sock

curl -s http://127.0.0.1:8006/cdh/resource/default/secret/1
# Returns an error until a secret is stored — that is expected
Step 5: Store a Secret in Trustee
Switch back to your SSH session on trustee-vm:
Install cococtl on trustee-vm (if not already present) and use it to populate KBS. The --kbs-url and --auth-key flags let cococtl target any KBS instance, including this standalone docker-compose deployment:
OS=$(uname -s | tr '[:upper:]' '[:lower:]')
ARCH=$(uname -m)
[ "$ARCH" = "x86_64" ] && ARCH="amd64"

COCOCTL_VER=$(curl -s https://api.github.com/repos/confidential-devhub/cococtl/releases/latest | grep tag_name | cut -d'"' -f4)
curl -fLO "https://github.com/confidential-devhub/cococtl/releases/download/${COCOCTL_VER}/cococtl-${OS}-${ARCH}"
sudo install -m 0755 cococtl-${OS}-${ARCH} /usr/local/bin/cococtl
Store the secret:
# Switch to the directory where you cloned the Trustee repo and ran the docker-compose step (`Step 2`).
cd ~/trustee

echo "lab1-secret-value" > secret.txt

cococtl kbs populate \
  --kbs-url http://localhost:8080 \
  --auth-key "${KBS_PRIVATE_KEY}" \
  --path default/secret/1 \
  --resource-file secret.txt
Step 6: Retrieve the Secret from Inside the CVM
Back on cvm-demo:
curl http://127.0.0.1:8006/cdh/resource/default/secret/1
# Returns: lab1-secret-value
The CDH forwards the request to the AA, which generates a hardware attestation report (SEV-SNP or TDX), sends it to Trustee, and — after the Attestation Service verifies the evidence against the platform’s hardware root of trust — KBS releases the secret. The value appears in your terminal without ever leaving the CVM in plaintext.
This is the same path a CoCo pod’s workload takes when it calls the CDH endpoint for a sealed secret or image decryption key.
What Just Happened
| Step | Component | RATS Role |
|---|---|---|
| CVM boot | AMD Secure Processor (SEV-SNP) or Intel TDX Module | Hardware Root of Trust |
| Attestation report generation | Attestation Agent (AA) | Attester |
| Report verification | Trustee Attestation Service | Verifier |
| Secret release decision | Key Broker Service (KBS) | Relying Party |
| Secret delivery to workload | Confidential Data Hub (CDH) | — |
Estimated Cost
Prices are approximate for East US (pay-as-you-go, June 2026). West Europe is typically 10–15% higher.
| Resource | AMD SEV-SNP | Intel TDX |
|---|---|---|
cvm-demo (CVM) | Standard_DC2as_v5 — ~$0.10/hr | Standard_DC2es_v5 — ~$0.15/hr |
trustee-vm (standard) | Standard_D2s_v3 — ~$0.10/hr | Same — ~$0.10/hr |
| OS disks (2 × 30 GB) | ~$0.01/hr combined | ~$0.01/hr combined |
| Total | ~$0.21/hr | ~$0.26/hr |
| 2-hour lab session | ~$0.42 | ~$0.52 |
| Left running 24 hr | ~$5.00 | ~$6.20 |
Stop both VMs when taking a break to avoid unnecessary charges:
az vm deallocate --resource-group cvm-lab --name cvm-demo --no-wait
az vm deallocate --resource-group cvm-lab --name trustee-vm --no-wait
Restart them when resuming:
az vm start --resource-group cvm-lab --name trustee-vm
az vm start --resource-group cvm-lab --name cvm-demo

# Refresh IPs (they change on restart if using dynamic allocation)
export TRUSTEE_PUBLIC_IP=$(az vm show -g cvm-lab -n trustee-vm --query publicIps -d -o tsv)
export TRUSTEE_PRIVATE_IP=$(az vm show -g cvm-lab -n trustee-vm --query privateIps -d -o tsv)
export CVM_PUBLIC_IP=$(az vm show -g cvm-lab -n cvm-demo --query publicIps -d -o tsv)Cleanup
Delete the entire resource group — VMs, disks, VNet, and NSGs — in one command:
az group delete --name cvm-lab --yes --no-waitVerify deletion is complete (takes 2–5 minutes):
az group show --name cvm-lab 2>/dev/null && echo "Still deleting..." || echo "Deleted."